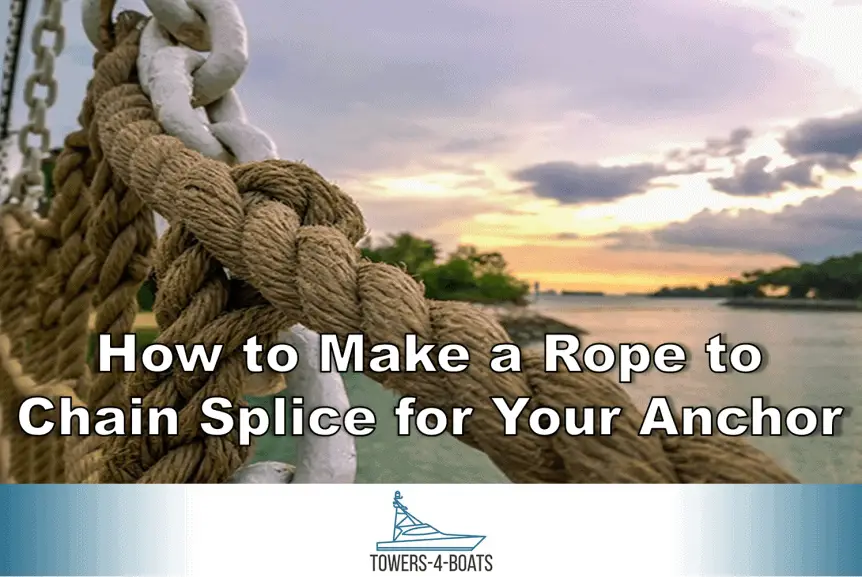
Rope to Chain Splicing: An Overview
If you have a length of chain between your anchor and the rope, you’ll want to know how to make a splice connection. Many boaters use a shackle to connect the chain to their rope. If you have a windlass, the shackle won’t fit though the cylinder, so you’ll have to splice the rope and chain together with a seamless transition. The connection between the rope and chain uses a long splice that removes and replaces the lays in order to connect the lines.
The following instructions explain how to make a splice using a three-strand rope. It’s much harder to splice braided rope, which is why a three-strand rope is highly recommended. This kind of rope can be spliced to a chain quickly on the first try, whereas braided rope splicing requires extensive practice.
If you would prefer to have a professional do this for you, there are experts in marine shops who can do splices for a nominal fee ($15-$25). Some marinas also sell pre-spliced lengths of chain and rope.
How to Splice Rope to Chain: Step-By-Step Directions
 Before you begin, it’s important that you understand some basics about this procedure. Your strand will try to unravel while you’re trying to keep it together. After some practice, you should be able to do this with a new rope without using stiffening agents, but if you still have unraveling issues with your rope, a coating of hairspray may offer you some assistance.
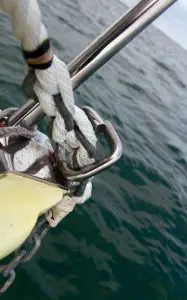
There will still be two strands twisted together after you remove one strand. You want to slide this chain-link down both strands until it’s joined with the strand that’s separated. You should have a two-foot tail extension beyond the link.
Now you’re ready to splice. All three strands need to be bent to the side. The two strands that have already passed through the chain need to be separated. The strand that’s nearest to the outside strand will become important later. For now, it’ll be called the second strand.
The third strand will be unwound next and will be wound into the nearest strand (the second strand). This can be done by taking the third strand that didn’t go through the chain out and replacing it with a strand that did get through the chain. While you are taking out the third strand, the second strand will be packed into a leftover groove. You will continue this process until the full length of the splice has been buried at a minimum of 2 feet.
You will continue doing this down the rest of the rope, removing each third strand and following it closely with the second strand.
Once you reach almost 5 inches from the end of the rope, you’ll need to tie a square knot with the second and third strands. The square knot will be hidden from sight after it is placed into the groove of the rope. The tails of the knot are tucked into the rope lays three times. We recommend tapering the tails while you’re going through every tuck to ensure that the transitions are gradual leading away from and up to the knot. You don’t want the transitions to ruin the windlass.
You will then begin to work on the chain again. Make sure the second strand isn’t trying to tuck itself into the rope or tries to fold itself over the link. The first strand must remain and is the next item that will be addressed in these instructions.
The first strand needs to be tied with itself a half hitch. From there, the half hitch will be tightened. Once the knot is tightened the tail can easily be tucked into the rope lays.
The second strand used a long splice to connect it to the rope, while the first strand uses a short splice to keep it connected. Continue doing a minimum of 5 tucks into the rope. I normally tuck in the first strand 7 times which is ideal. Once I’m done with that, I taper the rope on subsequent tucks.
Tapering is easier than you think. It’s as simple as separating the yarns of the strand you tried to keep together and counting how many yarns there are. From there, you will divide the yarns up equally and snip them as you’re going along. Equal groups of three are best because they give even tapers on each tuck that are 33% smaller.
The final result of this procedure is a splice that’s evenly tapered and can easily flow through a windlass. Working the rope along with rolling it helps keep the lays in place. The load placed on it through anchoring will quickly get the strands back into their lay.
Connection Strength
If using two strands instead of three to hold a chain together sounds concerning, it’s because it is. You’ve reduced the rope’s overall strength from three down to two strands.
However, these splices are typically stronger than three strands of rope. Two of the functional strands are folded over and tucked inside the rope, creating a 2:1 radio on every strand. Four strands of rope are actually holding the chain together. Folding and tucking the two strands into the rope created a four-strand chain.
Always make sure the links are tightly tied into the rope so it won’t wiggle while it’s being used. If the rope wiggles or moves much at all, this will cause chafe which will cut through multiple strands simultaneously. Having the strands snugly tightened around the rope while having them spliced back into the rope will create a strong rope to chain connection that will flow undetected through a windlass without using a thimble.
Splice Upkeep
Splices are supposed to minimize any chafe that may occur between the chain and the rope, but it does take a significant load amount while you’re at anchor – even more so in rougher conditions. Your boat’s safety, while it’s at anchor, depends on the condition of the splice, which is why it should be regularly checked to make sure it’s in good working order. If any evidence of chafe, unraveling, or wear exists, the splice should be remade right away. These instructions make this process very easy, so make sure you check and remake the splices when necessary.
If you want to see an expertly done step-by-step guide, check out animated knots.